To cast on means to put loops on a needle. These loops will form the starting edge of your knitting. There are several methods of casting on. I will provide instruction in one of them. It is not the easiest to learn. But it has advantages that make learning it worth the effort. It is called the "Long Tail Method." 1. Decide how many stitches you want on your practice piece. I will assume you decide to have 20. Measure a point at least 20 inches from the end of your yarn and make a slip knot there. See the picture above for a strand of yarn with a slip knot. The yarn between the end and the slip knot is the "tail." The yarn between the knot and the ball of yarn is the "working yarn." You should be able to adjust the size of the loop using the working yarn. If it is the tail that adjusts the size of the loop, make a new loop.
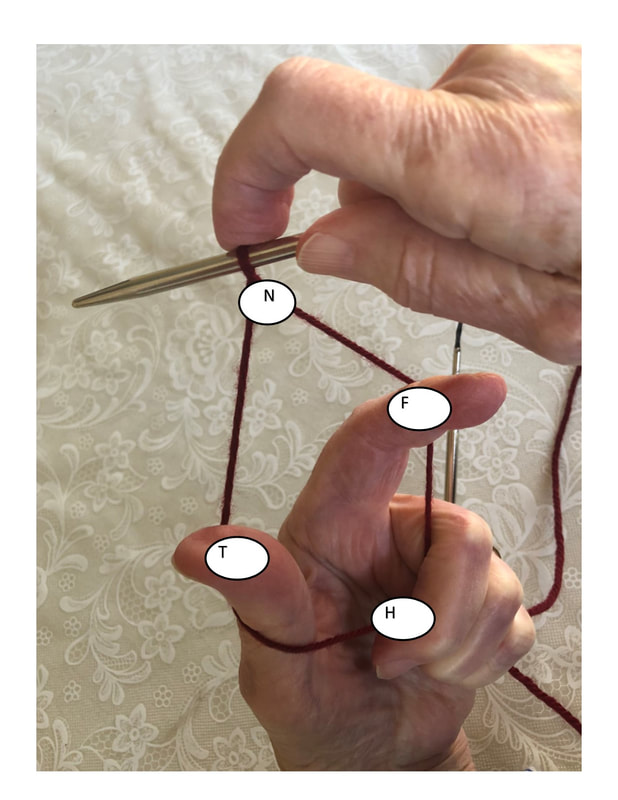
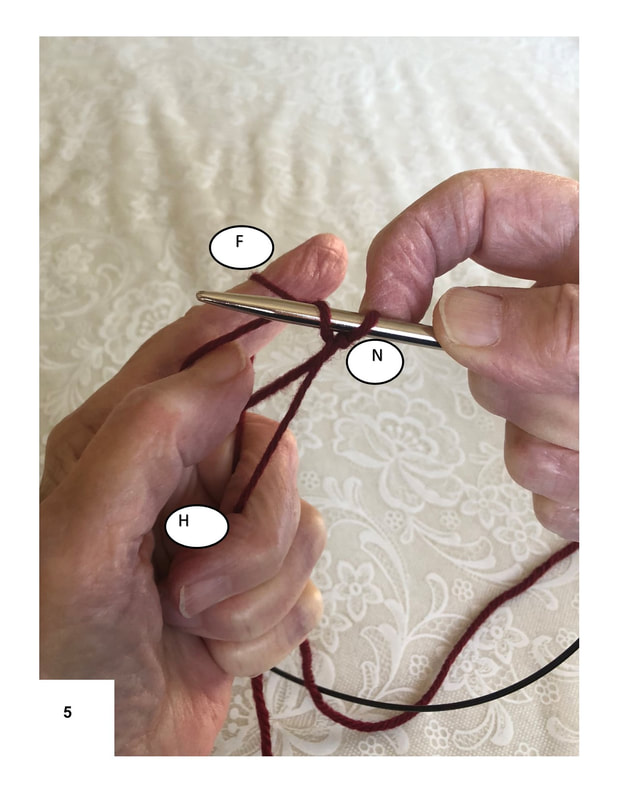
2. Put a needle through the loop. Tighten the loop until it fits on the needle easily, but not tightly. Now, with your left hand using the pinkie finger and the next two fingers (three in all), grasp the tail and the working yarn and hold the needle as shown in the picture below. Your thumb and first finger will be between the two strands of yarn. Spread the thumb and finger apart to form a diamond shape with the two strands of yarn. The strand that goes from point N (Needle) around point T (Thumb) to point H (Hand) is the tail. The working yarn goes from point N around point F (Finger) to point H.
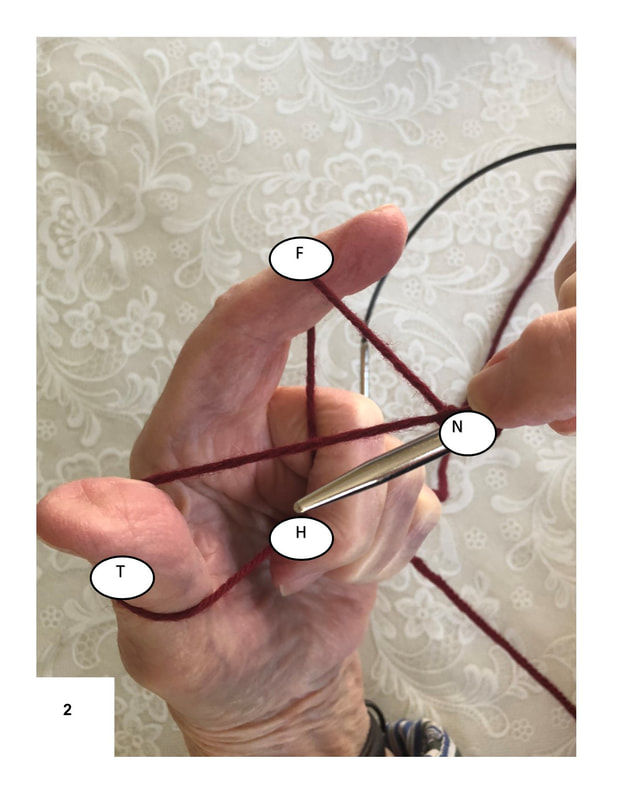
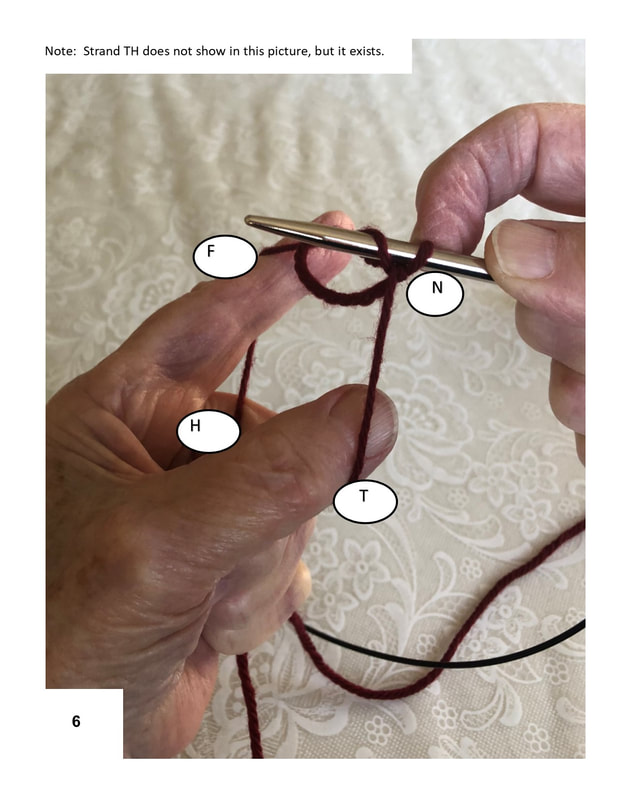
3. Now put the needle under strand TH, then up over strand NF, and over and around under NF. This may seem complicated, but take your time, look at the yarn you are holding, compare it with the pictures above and below, and keep trying until you get them to match. Once you do it a few times, it will feel easier. Try to learn the feel of these movements.
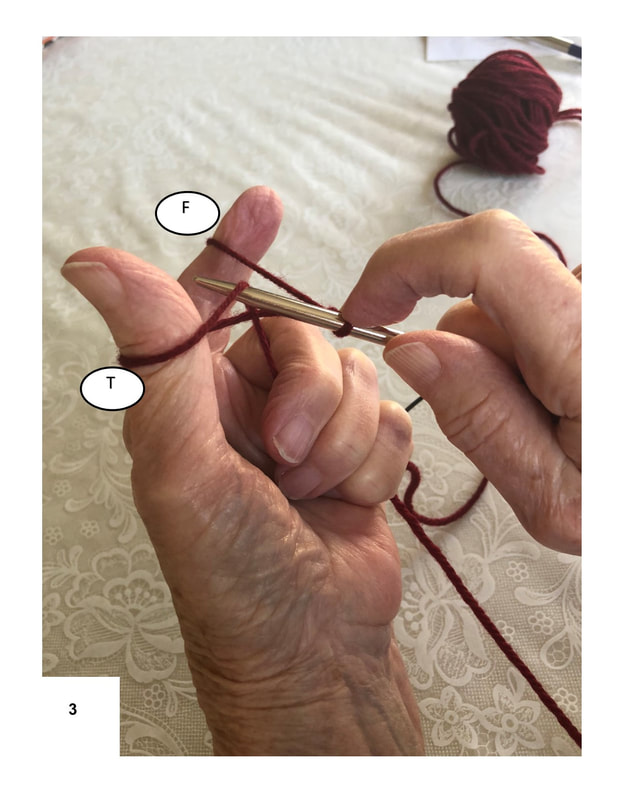
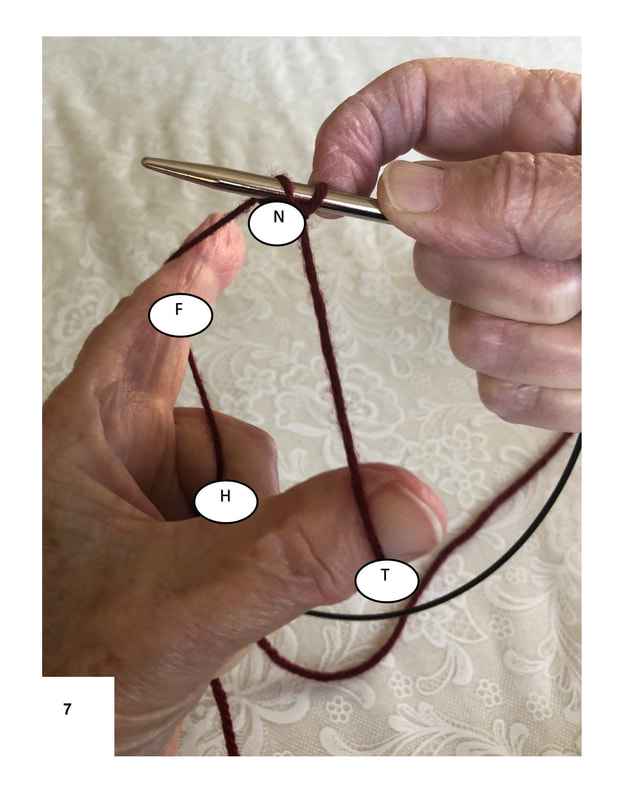
4. Let the yarn slide off your thumb as shown in the picture on the right above. You will be forming a loop with your needle. Let this happen, and move your thumb under the strand that now extends from N to H. You will be reestablishing point T between N and H.
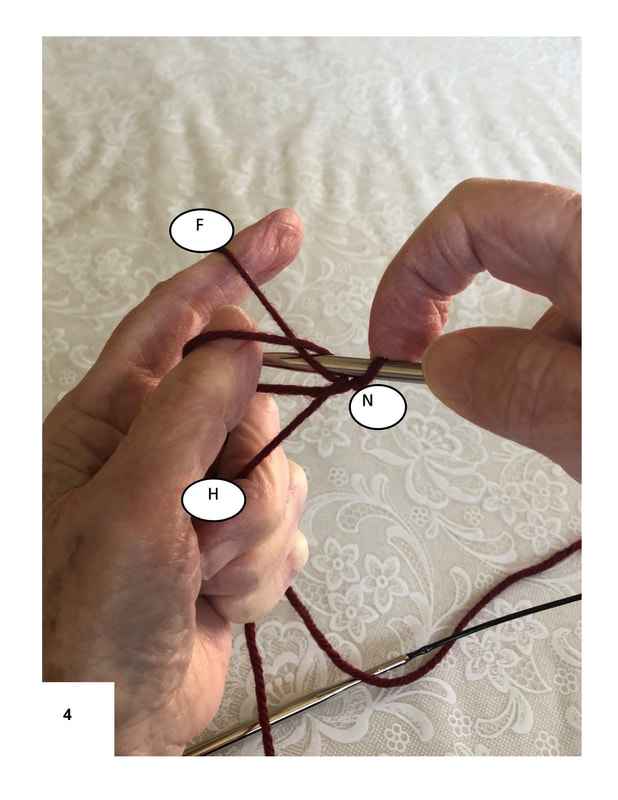
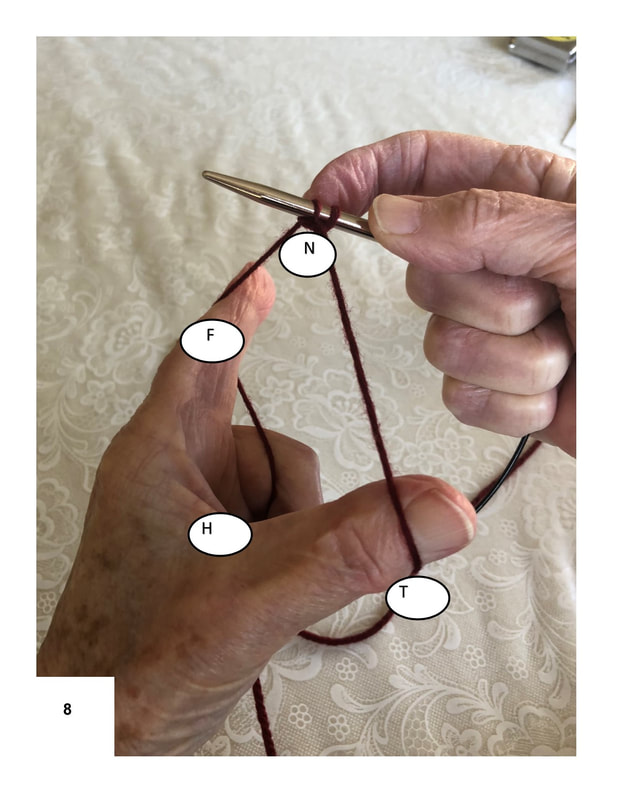
5. Gradually tighten this loop with your thumb. Now you should be back to the starting position. The last picture in this series matches the first picture. In the first picture there is one loop on the needle, and in the last picture there are two loops on the needle.
6. Repeat the process, adding one stitch at a time until you have a total of 20 stitches counting the original slip knot. Your needle should resemble the one shown in the heading of this page. When you have gotten this far, the hardest part is behind you. Now you are ready for step 2, ready to learn the knit stitch.